STM32CubeMX projects
CLion integrates with STM32CubeMX for embedded projects targeting STM32 boards. Before working with these projects in the IDE, you need to install STM32CubeMX and STM32CubeCLT. Then, you can open an existing STM32CubeMX project or create a new one.
Open a project
When you launch CLion, click Open on the Welcome screen.

Then, navigate to your project folder, select it, and click Open. CLion then will open your project as a CMake one.
You can also select the .ioc file in the project folder and then click Open as Project. Make sure that the name of the .ioc file does not contain spaces, non-latin symbols, or other special characters.
If CLion is already run, navigate to and open the project folder or the .ioc file.
Create a new project
In CLion, navigate to and select STM32CubeMX as your project type:

You can then follow the steps shown on the New Project screen or the more detailed instructions below.
Launch STM32CubeMX. In the window that opens, click ACCESS TO MCU SELECTOR. You can also select ACCESS TO BOARD SELECTOR.

Find your MCU or board in the list, then click Start Project in the upper right corner:

The Pinout & Configuration tab will open. From there, you can change the default settings displayed in Pinout view, configure additional parameters, or install middleware if necessary.

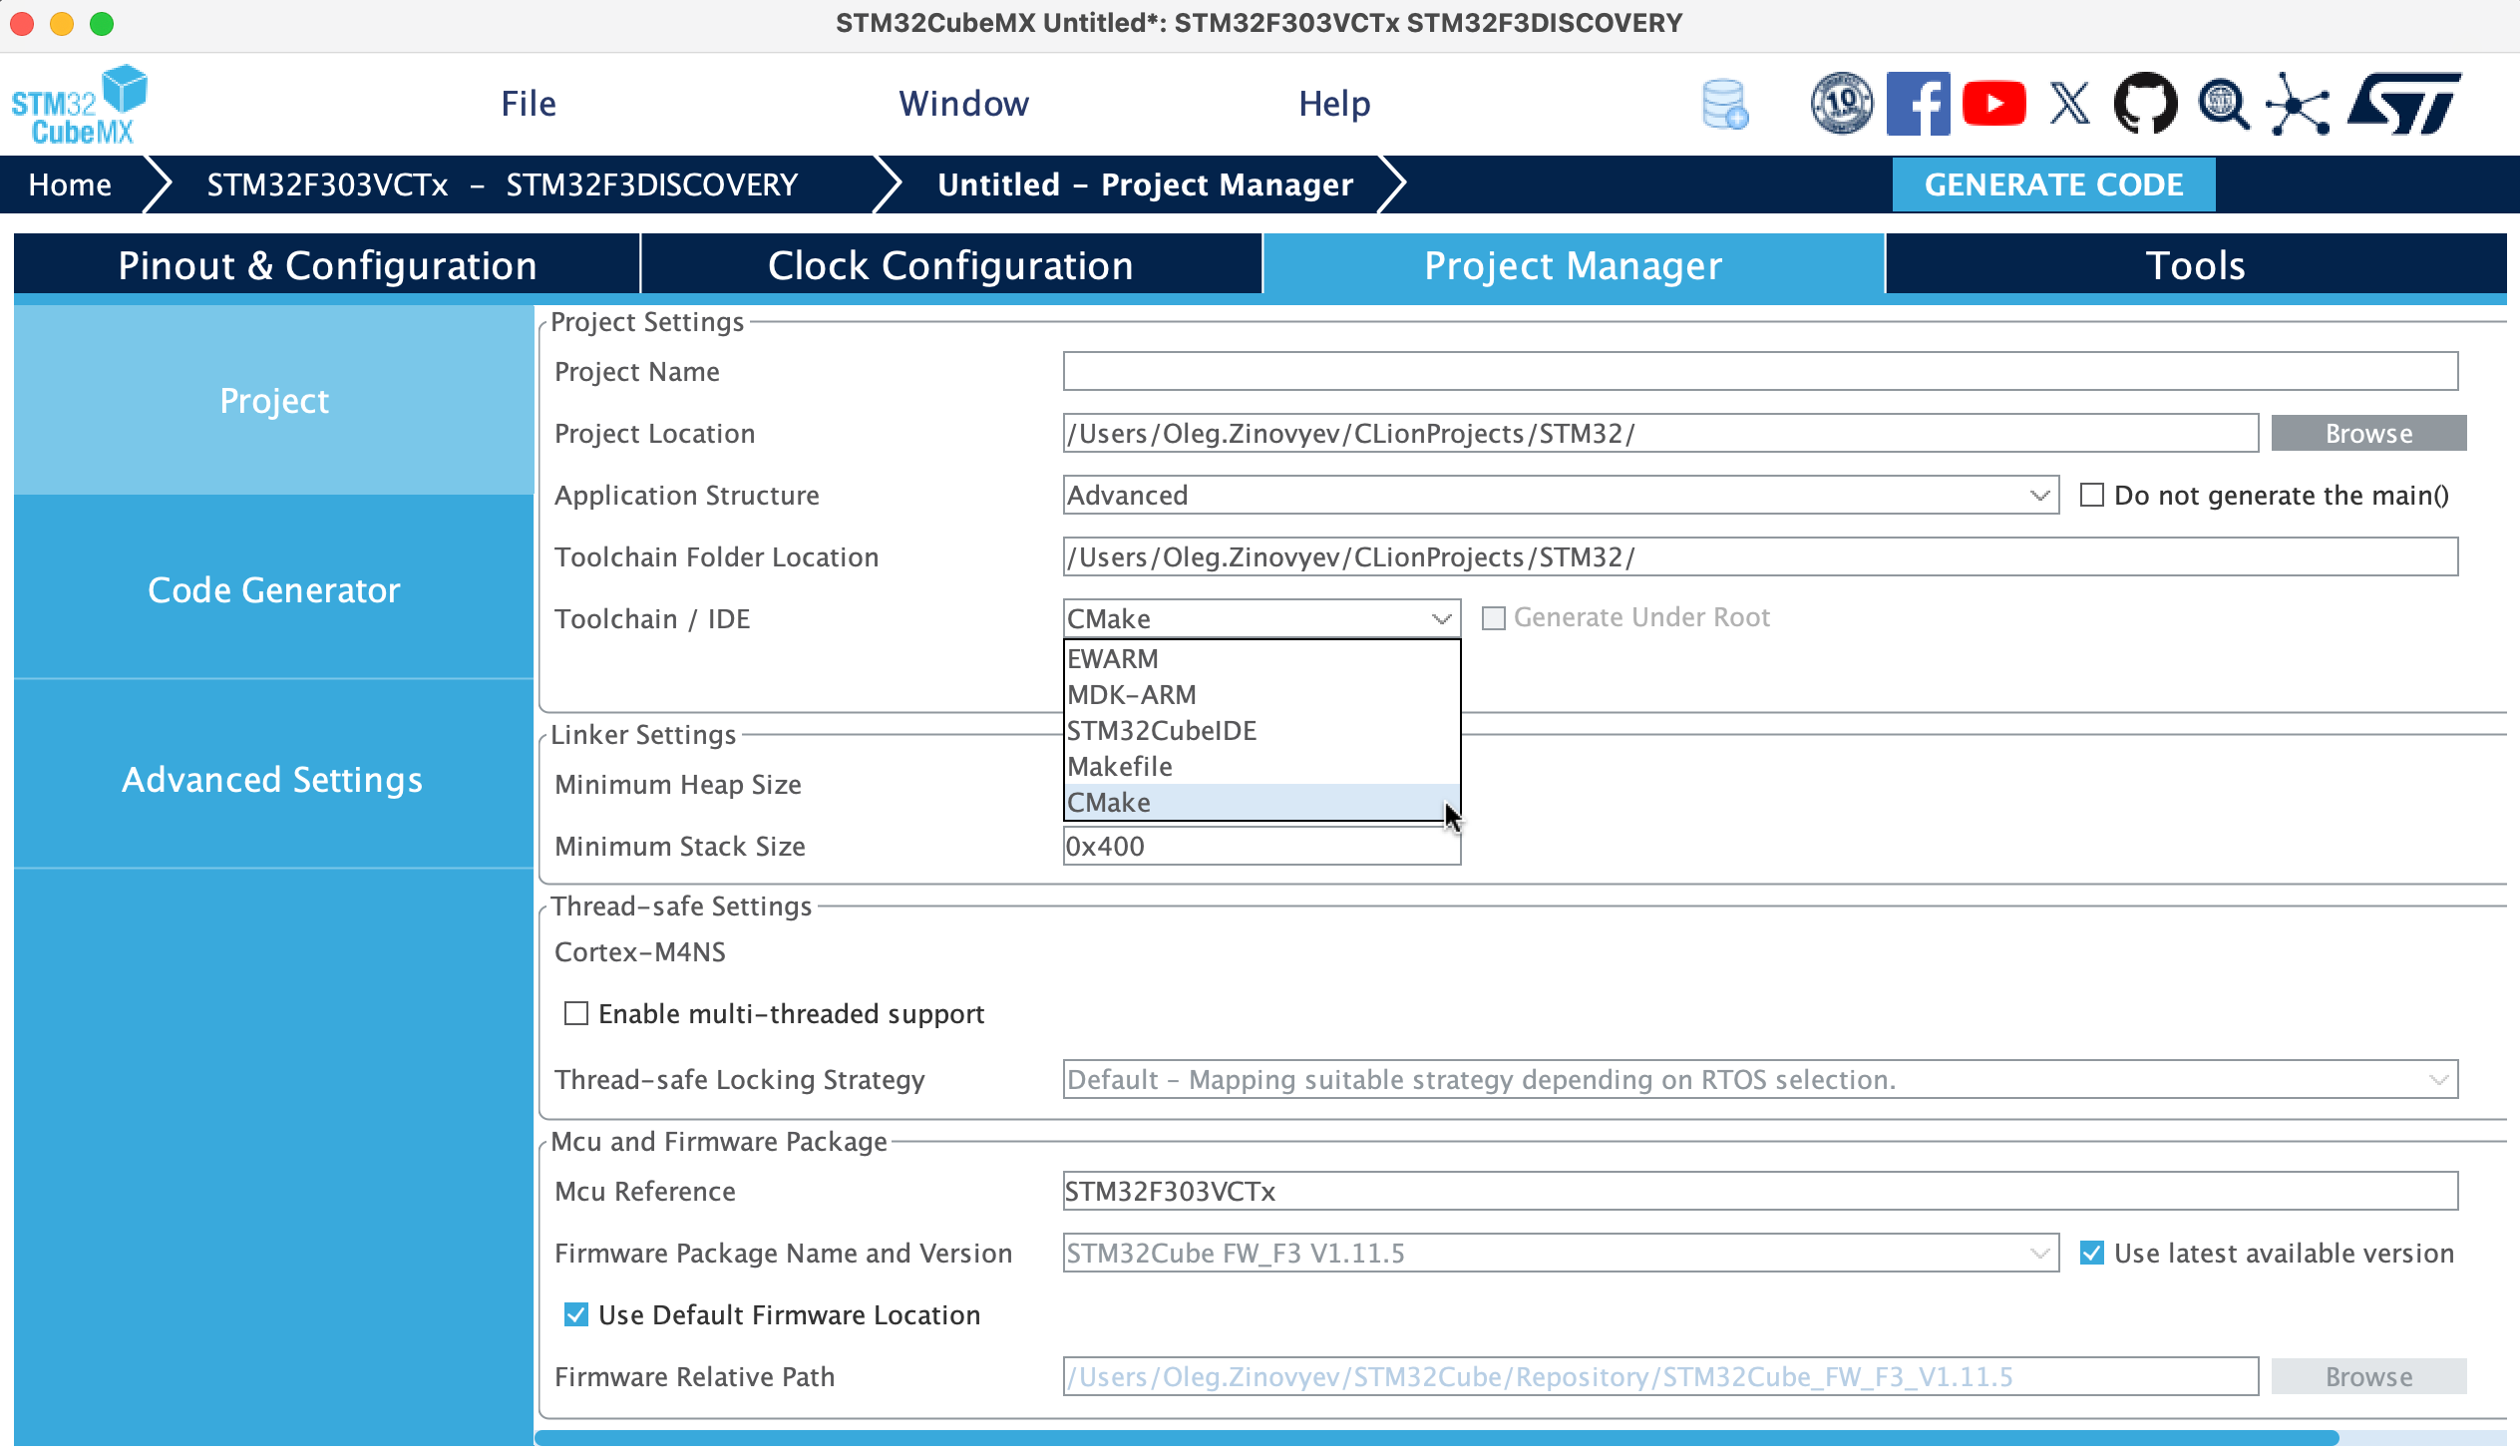
Click the Project Manager tab.
From the Toolchain / IDE dropdown menu, select CMake:

In the Project Name field, enter the name of your project:

In the upper right corner, click Generate Code.
Once generation is finished, close the Code Generation window:

Copy the path from the Toolchain Folder Location field using the keyboard shortcut: ^C on macOS or Ctrl + C on Windows/Linux:

Switch back to the CLion New Project window. Enter the path you copied in the Location field at the top of this dialog, then click Proceed:

The Open Project Wizard dialog will open. From there:
Remove the default Debug profile from the list.
Select the Debug - Debug profile.
In the profile, click Enable and then click OK:

Your STM32CubeMX project will be created:

Edit source code
While editing the files generated by STM32CubeMX, always enclose your code in the
/* USER CODE BEGIN ... */and/* USER CODE END ... */pseudo comments. Here is an example:/* Infinite loop */ /* USER CODE BEGIN WHILE */ while (1) { HAL_GPIO_TogglePin(LD3_GPIO_Port, LD3_Pin); HAL_Delay(1000); /* USER CODE END WHILE */This will protect your code from being overwritten by STM32CubeMX during code regeneration.
If you add source or header files, place them in the Src and Inc directories. Also, extract pieces of code into separate .c or .h files.
Build a project
To build you project, click the button on the main toolbar:

If everything works correctly, you will see Build finished in the Messages window:
